A Few Tips, Tricks, and Suggestions
It’s no surprise that with our extensive collection of baskets, we at kanju are obsessed with the basket wall trend that keeps on growing in popularity; especially in the vintage, boho, farmhouse, and costal design styles! With over 45,000 posts under #basketwall on Instagram, it’s obvious that this trend has taken the interior décor world by storm – and, we’ll admit, we are obsessed!
A basket wall is ideal for countless reasons: it’s trendy, adds unique texture and pattern, creates character, is entirely customizable to your taste and style, and is a stunning way to fill an empty wall. Considering the growing fascination with this style, and our huge collection of flat baskets, we thought it was about time to share some of our favorite tips, tricks, and suggestions for creating your very own statement basket gallery wall!

"It's hard to scroll through my Instagram feed and not see a basket wall. These babies are trending big time." - Erica Reitman, HGTV
A Few Suggestions Before You Get Started...
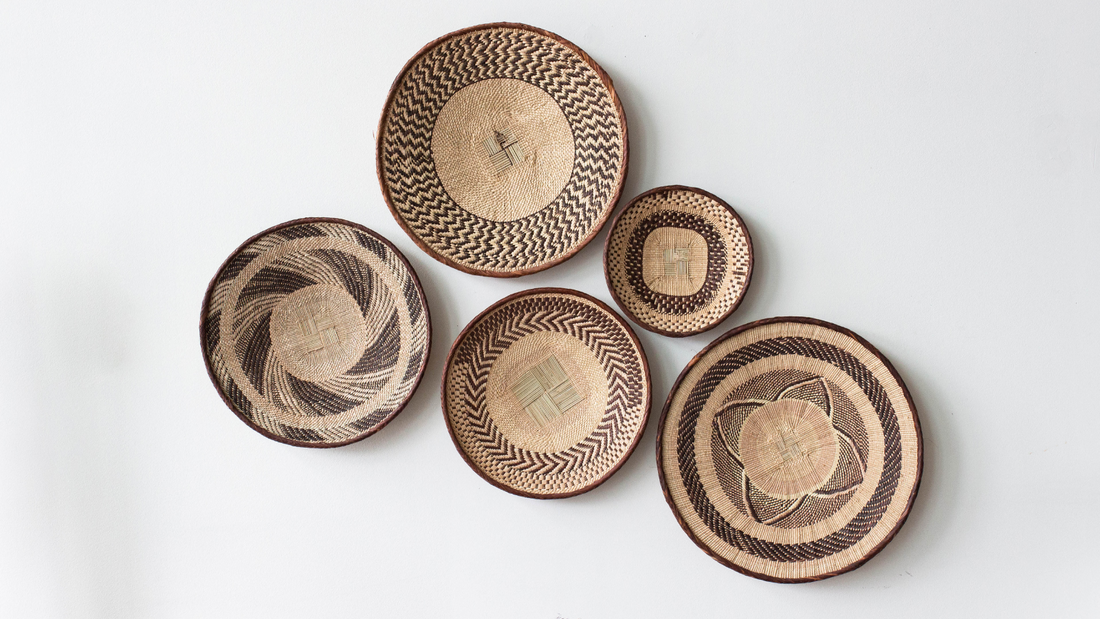
Don’t be afraid to mix up the sizes, styles, colors, and textures of your baskets; it’s a great way to add dimension and make your arrangement even more eye catching and unique to you.
You don’t need to start with a huge group of baskets. If you have found yourself with a handful of baskets you like, feel free to start your gallery wall and continue adding to it as you find more baskets you like.
Small basket displays can be just as stunning as large ones and can be much more practical for small spaces. Use a few small baskets, or even just one or two, to accent other wall décor, like mirrors or shelves, or even as a backsplash in your kitchen.
Don't be afraid of a more 'monotone' color palette. Keeping your color story simple, allows for the texture of your baskets to become the focal point of your gallery.
Decide if you prefer a tight grouping or a looser grouping (shown below) as this can affect the wall you choose to mount your baskets on.

Lets Get Started!
Step 1: Pick The Wall
Maybe you already have an empty wall that’s begging for a little spice and, if so, that’s awesome – you’re already done with step 1. But if you aren’t sure, look around your home for a wall that feels naked, sad, or just seems to disappear. It doesn’t even need to be a large wall! This style can look phenomenal just about anywhere: living rooms, entry ways, hallways, stairwells, bathrooms, kitchens, bedrooms, dining rooms, or even above a fireplace or bookshelf. You can also accent smaller spaces, like accent walls, counters, or columns, with just one or two baskets. The possibilities are endless, so take your time and choose a spot that you feel could really use a pop of style.

Step 2: Plan Your Layout on the Floor
Anyone who has ever put together a gallery wall will suggest that you lay out your pieces on the floor before mounting anything to the wall, and a basket wall is no different. This way you can play around with the placement without damaging the baskets or your wall. We recommend starting with the largest basket, or the basket with the most unique design, in the center as a focal point for your layout. If you are working with a smaller number of baskets, we love the idea of stacking them on top of each other (like in the photo below) for a modern and minimal look. From there, start working outwards using your largest baskets first to create balance and flow; as fun as a more chaotic layout may seem, we’ve found that there needs to be a method to the madness to create the basket wall of your dreams.
![]()
Step 3: Take a Picture of Your Arrangement
This step seems pretty self-explanatory, but we cannot emphasize enough taking a picture of your basket arrangement on the floor once you are happy with it. We know from experience that, once you start picking baskets up and mounting them on the wall, suddenly you start forgetting how your layout looked. “Did I want this one higher? Lower? Closer to the center? More spaced out? Did I even want it on this side?” Next thing you know, you are lost in a sea of baskets and are having to redo your layout! So, before you even think about picking up a basket to start mounting, Take a reference picture.

Step 4: Start Hanging Your Baskets
Now that you have you layout planned and your reference picture taken, it’s finally time to start hanging your baskets! There are several ways to do this but, we have listed some of the easiest ways that deal the least amount of damage.
If you are planning on using nails, start by looking for a gap in the weaving in the center of your basket, then (gently) hammer a nail through it.
If you would prefer to not nail directly into your basket, or want something that won't be visible, look for a gap in the weaving near the edge of your basket. String a small loop of fishing wire, or unwanted paperclip, through it and hang it from a hook or small nail in the wall.
If you would prefer to not put any nails in your wall at all, Command Strips are a great alternative and allow for an easily changeable arrangement.
*We also recommend keeping with the largest to smallest order we mentioned in Step 2, placing your focal point basket in the center of your wall first and building out; and don’t forget to use your reference picture if you get lost.

And, With That, You're Done!
Take a step back and marvel at the beautiful basket wall you have just created and start to think where else you might add some of those little accents to tie the look together throughout your home! Enjoy!
Looking to Start Your Basket Collection?
Kanju offers a range of flat baskets and shallow bowls in a variety of sizes and patterns that would be the perfect starting point for your personal basket collection! Whether you just want one basket to start your wall or want to complete your basket wall all in one shopping trip, we are certain we have the perfect basket for you.
Shop our Entire Wall Basket Collection Here!